
Overview
Item data pick lists allow you to add a dropdown menu to an item for the purchaser to select.
This could be T-shirt size, color, or any information that you have created in a list format.
Steps
- From the Main Menu, select Inventory > Item Data Pick Lists.
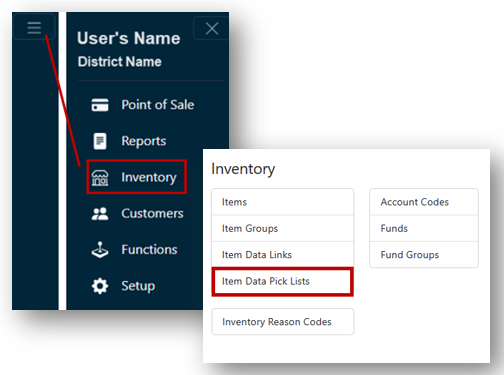
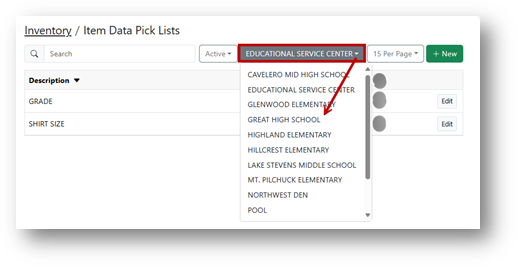
- If you have access to multiple sites, select the Site for the new pick list.
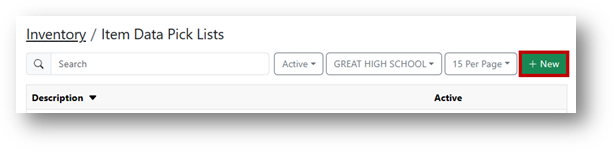
- Select + New.
- Under the Details tab, enter a Descriptionfor your new pick list.
- The Active checkbox is selected by default.
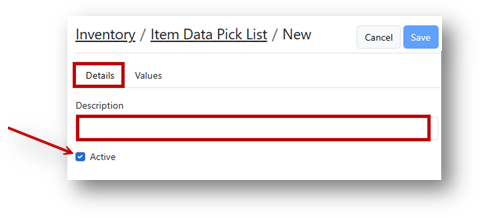
- The Active checkbox is selected by default.
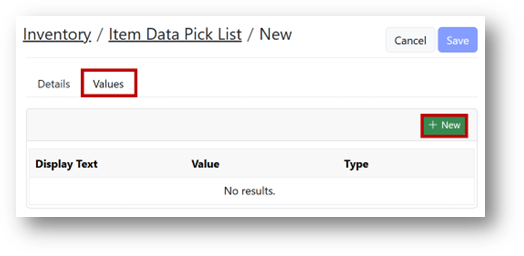
- Under the Values tab, select + New.
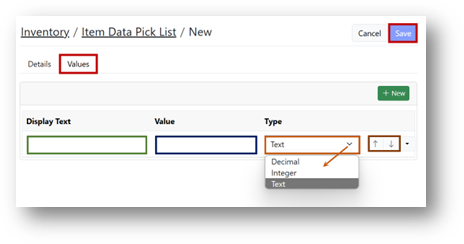
- Complete the fields:
- Enter the Display Text.
- Enter a Value.
- Select the Type from the dropdown.
- Move the pick lists by selecting the arrows at the end of each line.
- Select Save.
- You may enter as many options as you like per pick list. Select + New upon completion of your line.
- You may enter as many options as you like per pick list. Select + New upon completion of your line.
Outcome
You can create an item data pick list and add as many options as you like for purchasers to select from a dropdown menu on an item.
Troubleshooting
- The pick list is not available - Make sure the correct Site is selected and the Active checkbox remains selected.
- You need more than one option in the list - Select + New upon completion of your line to add another option.
- The values appear in the wrong order - Use the arrows at the end of each line to move the pick list values.