Schedule Interface in InTouch will allow you to set up a fee schedule for courses that have associated fees that need to be assessed. The interface will use your district’s schedule information to automatically assess fees to students enrolled in any of the courses you have set up to do so.
TABLE OF CONTENTS
- Prerequisite
- Enabling Schedules Interface Access for Users
- Schedules Interface Configuration
- Terms Tab
- Fees Tab
- Settings Tab
Prerequisite
Districts wishing to use the Schedules interface must make the schedule information available to InTouch via the standard nightly data feeds. Please note - due to data throttling, some system APIs do not support the Schedules interface functionality.
Enabling Schedules Interface Access for Users
For users to access the Schedules interface to set up/maintain the necessary settings and fees schedules, they must belong to a User Role in InTouch Pay that grants them access.
User Role maintenance is an InTouch Administrator task (typically District Office level) and is found in Setup > User Roles.
- Select ‘Edit’ on the user role you’d like to update.
- Select the ‘Admin’ tab of the user role.
- Find the ‘Schedule Interface’ in the list of available integrations
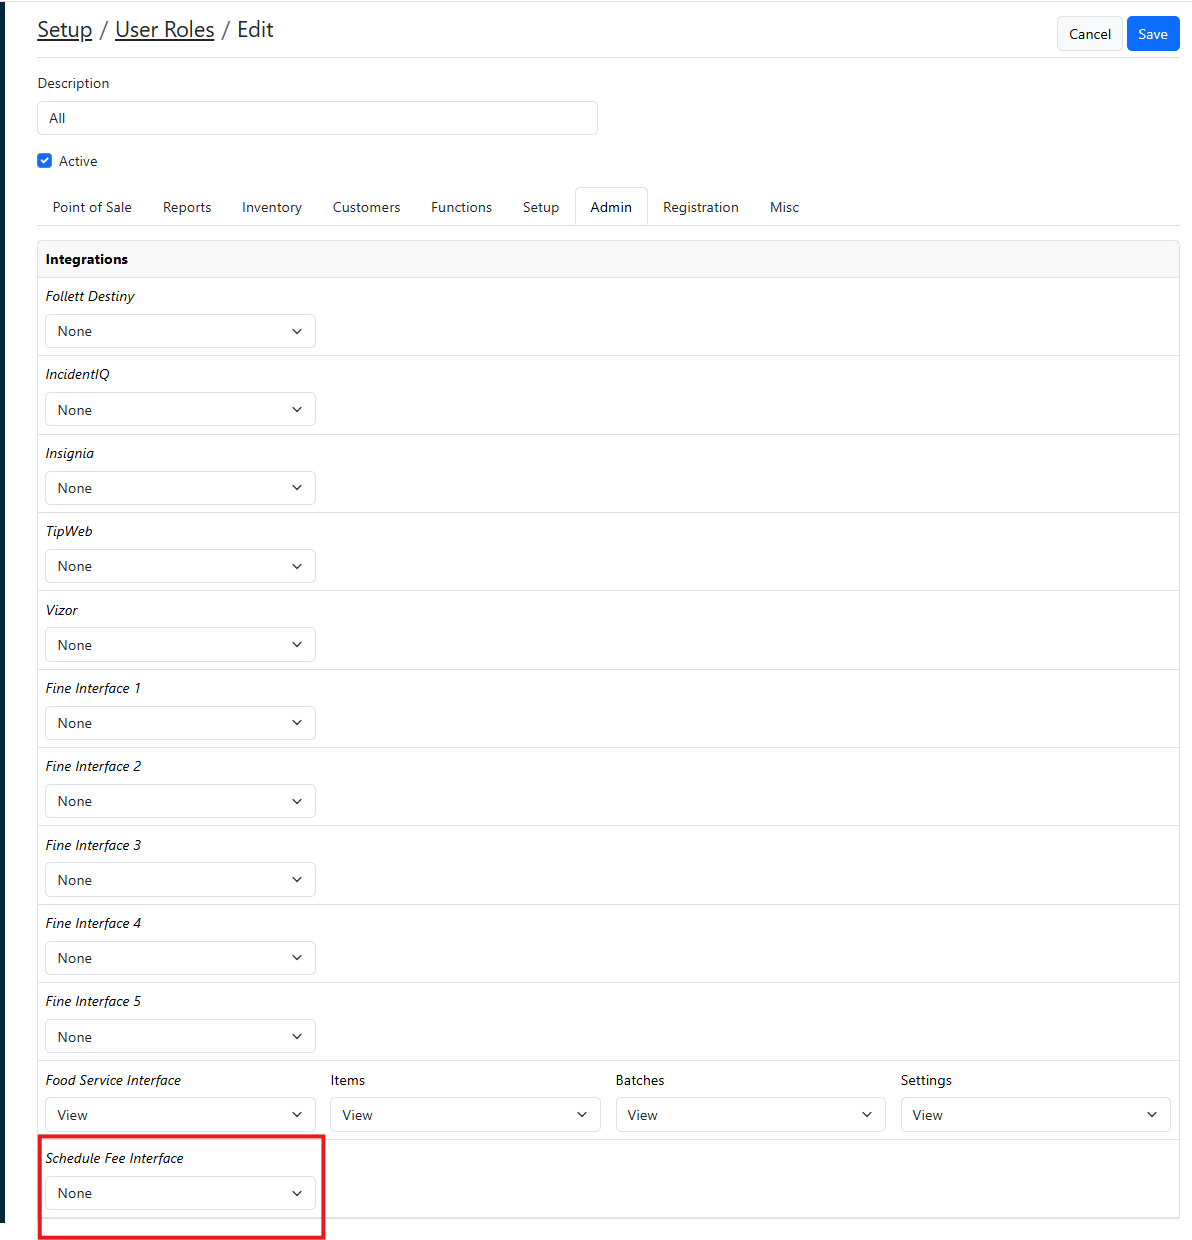
- Using the available drop-down, select the box to allow the user role to ‘View’ the interface. Once selected, this will provide you with the ability to grant access to other controls for the integration. The following access options are available, and you can select multiple to grant full control:
- View- the user will only be able to view the existing setup. They can make no changes.
- Add- the user will be able to add new selections for this option without being able to make changes to any existing settings.
- Edit- User will be able to edit existing setup without being able to add/delete.
- Delete- User will have access to delete existing setup for the options for which this is selected.
- All- User will have all the above selected and full control of the data points this is selected for.

- The following components each will have the control options noted above:
- Terms
- Fee Items
- Settings
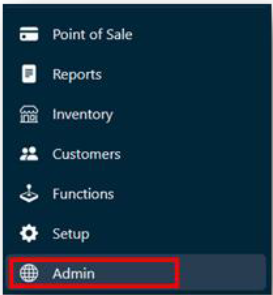
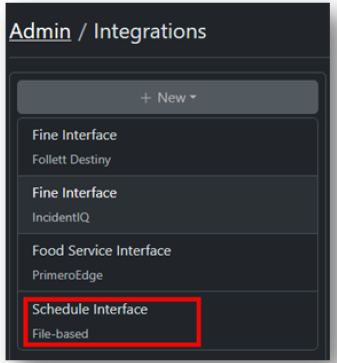
- Once the user role has been granted access to the Schedules interface, the ‘Admin’ option becomes available in the InTouch Pay navigation menu. This may have been previously enabled for other functions:
- The Schedules Interface will be available to select:
Schedules Interface Configuration
The Schedules interface has 3 tabs commonly used in order for the system to process fee assessments with the desired results. The ‘Logs’ tab is available and requires no setup but will show the activity of the interface once it’s been enabled.
Terms Tab
The ‘Terms’ tab will need to be set up to assign the proper start and end dates of each of the available terms that will use the interface to assess fees. Any terms not used or that will not have course fees associated with them do not need to be entered.
Complete the following for the Terms section:
- Using the available ‘Action’ drop-down, select ‘Add Missing Year/Term Combinations’. This will populate the table below with the term data we receive from your student information system.
- For each term that will have a course that needs fees assessed, you will need to populate the start/end dates of that term. The dates entered into these fields are what will control when course fees begin and end being managed for the term. The start and end dates entered for any term do not need to match the official start and end dates in the SIS. If any term’s course fees have been individually assessed manually at the start of the term (this is common), setting the start date prior to those fees being assessed will prevent them from being duplicated by the interface.
- Once the date fields have been set for the desired terms, click Save.

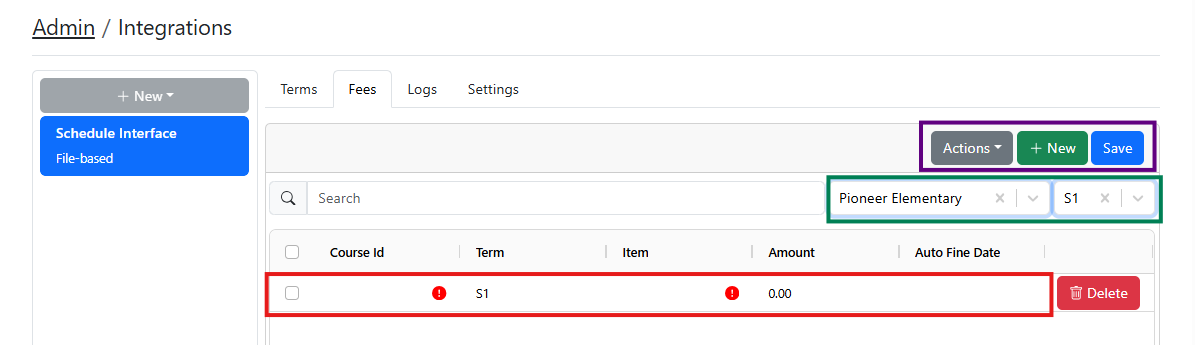
Fees Tab
The Fees tab will be used to set up the matrix for your course fees that you wish to be charged automatically to any student enrolled in the courses you set up. Complete the following to set up your fee schedule:
- Using the Select Site drop-down, select the site for each site needing fees assessed.
- Using the Select Term drop-down, select the desired term to begin entering fee assignments for that term.
- Select the ‘New’ button to add a new data line for each course fee that needs to be set up under the selected term for the selected site.
- In the Course ID field, enter the Course ID from the student information system exactly as it is in the student information system (case-sensitive).
- From the Item field drop-down, select the InTouch fee item you wish to be assessed for the course indicated in the Course ID field. The price-point associated with the selected fee item will automatically populate in the Amount field. NOTE: updating an items price in Inventory does NOT automatically sync to this screen.
- Set an auto-fine date for the fees that assess. This will be the date that fees still outstanding will automatically convert to Fines, which prevents them from being removed if the student drops the course thereafter. If you need to update the auto-fine date in bulk (e.g. when updating from the previous year), use the Action button on this screen to do so.
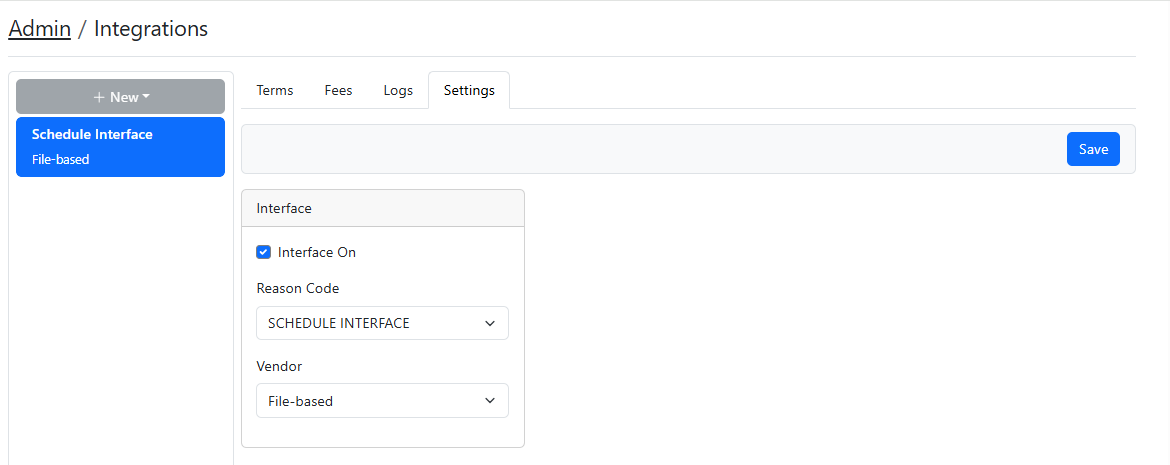
Settings Tab
The only setting you should need to update on this tab is to select the ‘Interface On’ box. Only enable this once you’ve completed your setup for all terms/courses.
The schedules interface fee assessment process will run once daily after the interface has been enabled and the date reaches the first start date set up in the Terms tab.
Note: If any of the other options are blank, please reach out to support@intouchreceipting.com to have them confirm that your district is set up to use the Schedules interface.