Note: You must first have the Account Code built for the items you will enter into inventory.
TABLE OF CONTENTS
Creating Items
- From the Main Menu, select Inventory.
- Click Items.

- Click the + New button.

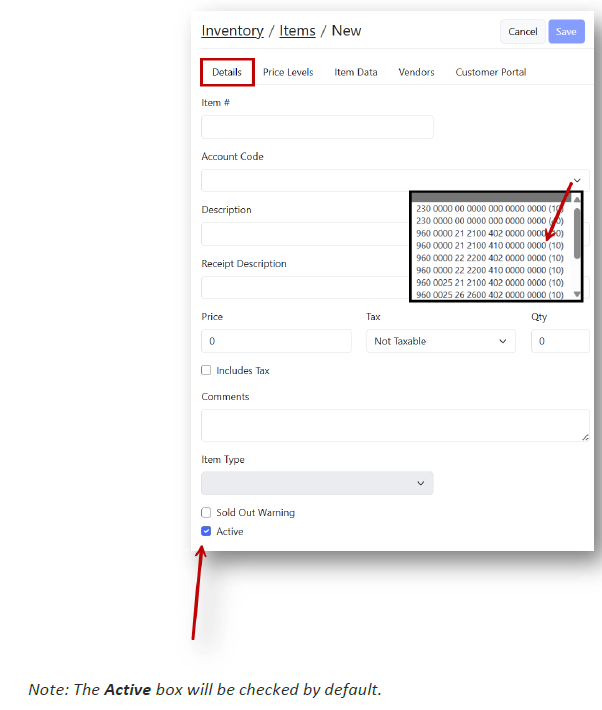
- Complete all fields on the Details tab:
- Item #
- If you have a scanner- scan your Item's Barcode (if applicable)
- Create a unique alphanumeric item # to identify your item.
- Account Code
- Click the dropdown to choose the appropriate Account Code or Department to route the item to for reporting purposes.
- Description
- Add a description that best describes the item.
- Receipt Description
- Add a description that will appear on receipts
- Sale Price
- Quantity Available
- Comments
- Sold Out Warning
- Check the Sold Out Warning box if you would like a message to be displayed in the Point of Sale screen when the item's quantity is below ten (10).
- Check the Sold Out Warning box if you would like a message to be displayed in the Point of Sale screen when the item's quantity is below ten (10).
- Item #
Price Levels-Optional:
If you would like to add price levels to your Item, under the Price Levels tab, click + New.
- Complete the line:
- Enter a description for this level
- Enter a price
- Choose the type of level (fixed or percentage) from the dropdown.
- Select a Customer Group that the level will apply to.

- Complete the line:
- Click Save.
Note: You may add several price levels to your item. If you would like more than one level, click + New and repeat the steps to complete the additional line. Data Elements-Optional:
If you would like to add data elements to your item, under the Item Data tab, click + New.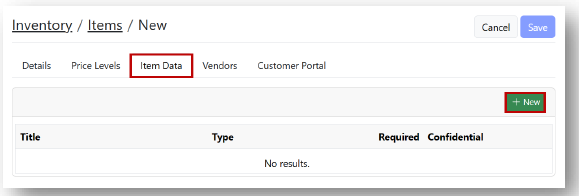
- Complete the line:
- Enter a Title for this data element
- Select the Type from the dropdown
- Enter the information necessary for that data element if required
- Check the Required and/or Confidential boxes if necessary
Note: If the confidential box is selected, the data elements will not show on the receipt.
- Complete the line:
- Click Save.
Note: You may add several data elements to your item. If you would like more than one data element, click + New and repeat the steps to complete the line. You may arrange the data elements by clicking the up/down arrows on the right side of the line. You may delete the data element by clicking the dropdown arrow and selecting delete.