Buttons in the Point of Sale system allow quick access to frequently sold items and navigation between button layers. There are two main button functions:
- Sell Item – Attaches an item to a button for quick sales.
- Go To Layer – Opens a new set of buttons on a different layer.
Requirements
Before creating buttons, ensure that items are already set up in the system. Users must have the appropriate role permissions to create and edit buttons.
Opening the Button Editor
- From the Main Menu, select Point of Sale.

- Click and hold on any existing button to open the Button Editor.

Note
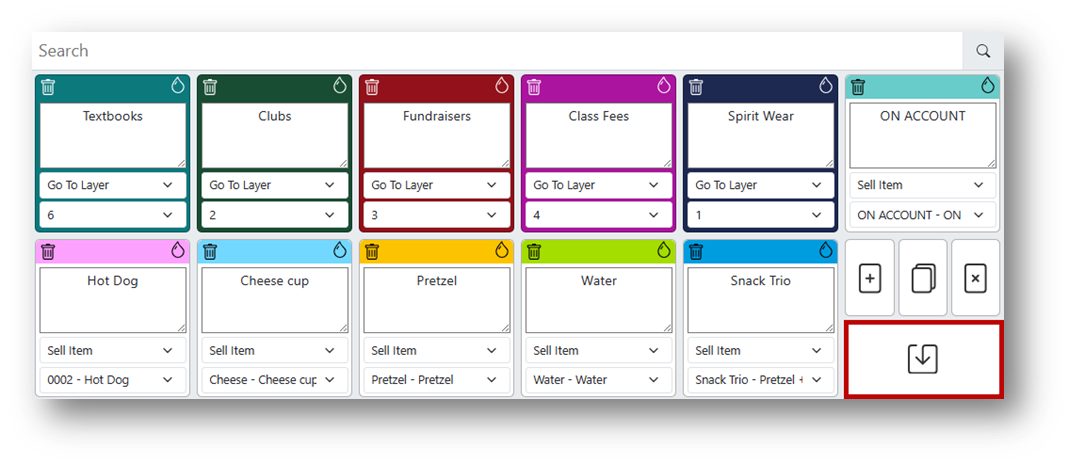
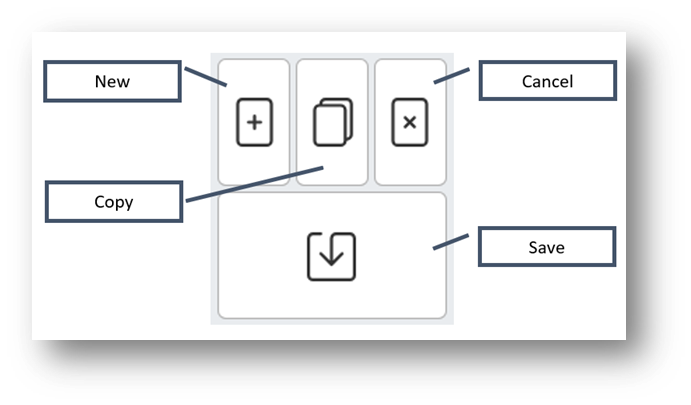
The Button Editor includes options for New, Copy, Cancel, and Save.
Note
Button functions include Delete, Paint Drop, Label, Function, and Selection.

Adding a Sell Item Button
- Open the Button Editor.
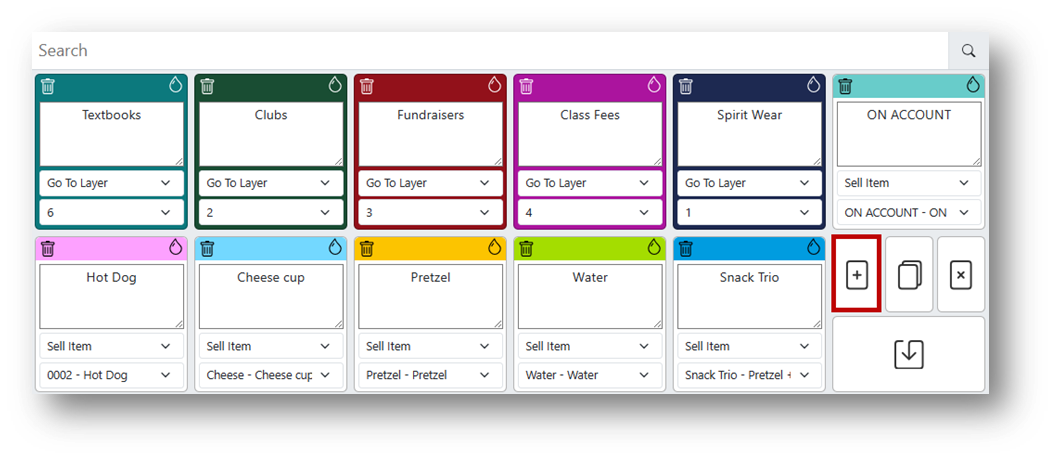
- Click the + New button.

- From the Function dropdown, select Sell Item.

- Use the Selection dropdown to choose the item that will be sold.

Note
The label on Sell Item buttons auto-populates with the item’s receipt description but can be edited.

- To change the button color, click the Paint Drop icon.

- Click Save in the Button Editor when finished.