Inventory items represent the individual products that are sold. These items are entered into the system and tracked per serving. Items must be assigned to specific vendors to monitor cost variations and manage pricing, costs, and margins effectively.
Requirements
Before entering items into inventory, ensure that the Account Code and Vendor are set up.
Steps
- From the Main Menu, select Inventory.
- Click Items.

- Click the + New button.

- Complete all required fields in the Details tab.
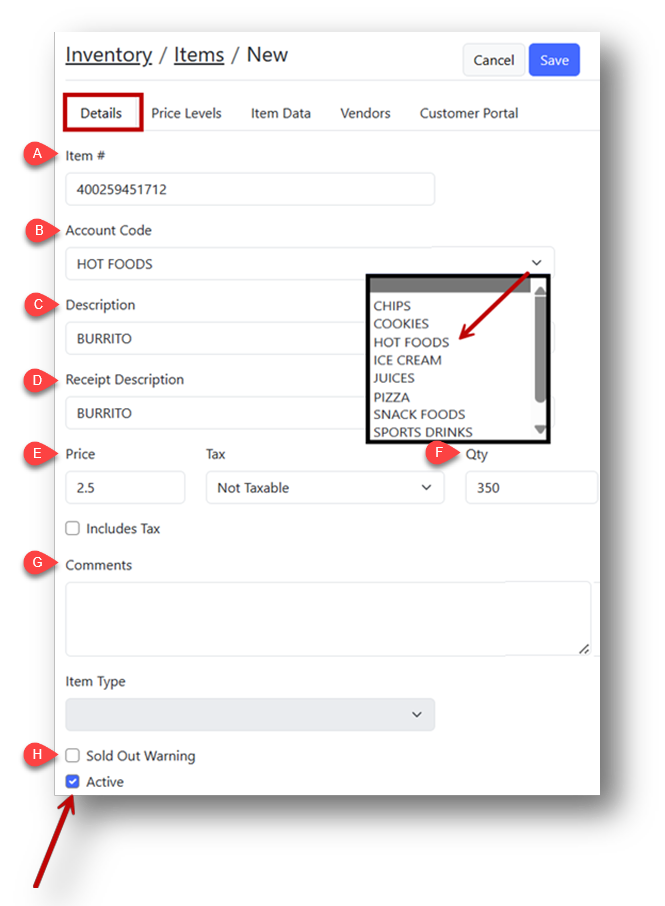
- Item #:Enter an item number using one of two methods:
- Scan the barcode if using a scanner.
- Manually create a unique alphanumeric item number.
- Account Code: Select the appropriate account code or department for reporting.
- Description: Enter a clear description of the item.
- Receipt Description: Add the description that will appear on receipts.
- Sale Price: Enter the selling price.
- Quantity Available: Specify the current quantity available.
- Comments: Add any necessary comments.
- Sold Out Warning: Check this box to display a warning in the Point of Sale when the item’s quantity is below ten (10).
Note
The Active checkbox is selected by default.
- Under the Vendors tab, click the + New button.

- Select the Vendor for the item from the dropdown.

- Units Per Case: Enter the number of sales units per case.
- Cost Per Case: Enter the cost of the ordering quantity.
- Example 1: If purchasing a 24-unit case of water for $11.00, enter 24 in Units Per Case and 11.00 in Cost Per Case.
- Example 2: If purchasing a 5-pound bag of espresso beans for $44.75, enter 250 in Units Per Case (assuming 250 1oz shots of espresso per bag) and 44.75 in Cost Per Case.

Note
The system automatically calculates the Cost Per Unit.
- Repeat for any additional vendors.
- Click Save.